Photography Tutorial 2: Using Graduated and Radial Filters to Enhance Images

Most images can be improved by using different settings to those used on the camera when the photograph was taken. This example shows how adjustments can be taken further making changes to certain areas of the photograph rather than the entire image.

In Lightroom there are three types of Local Adjustment filters;

  • Graduated Filters – where a straight line is used to define the area to be adjusted.
  • Radial Filters – where circular to oval shapes are used to define the area to be adjusted.
  • Brush Filters – these rely on a steady hand to brush over the area to define the adjustment area.

For this example I used Graduated and Radial Filters.
(Brush filters are shown in a later example).

See more images on Instagram

Using Graduated and Radial Filters Step-by-Step

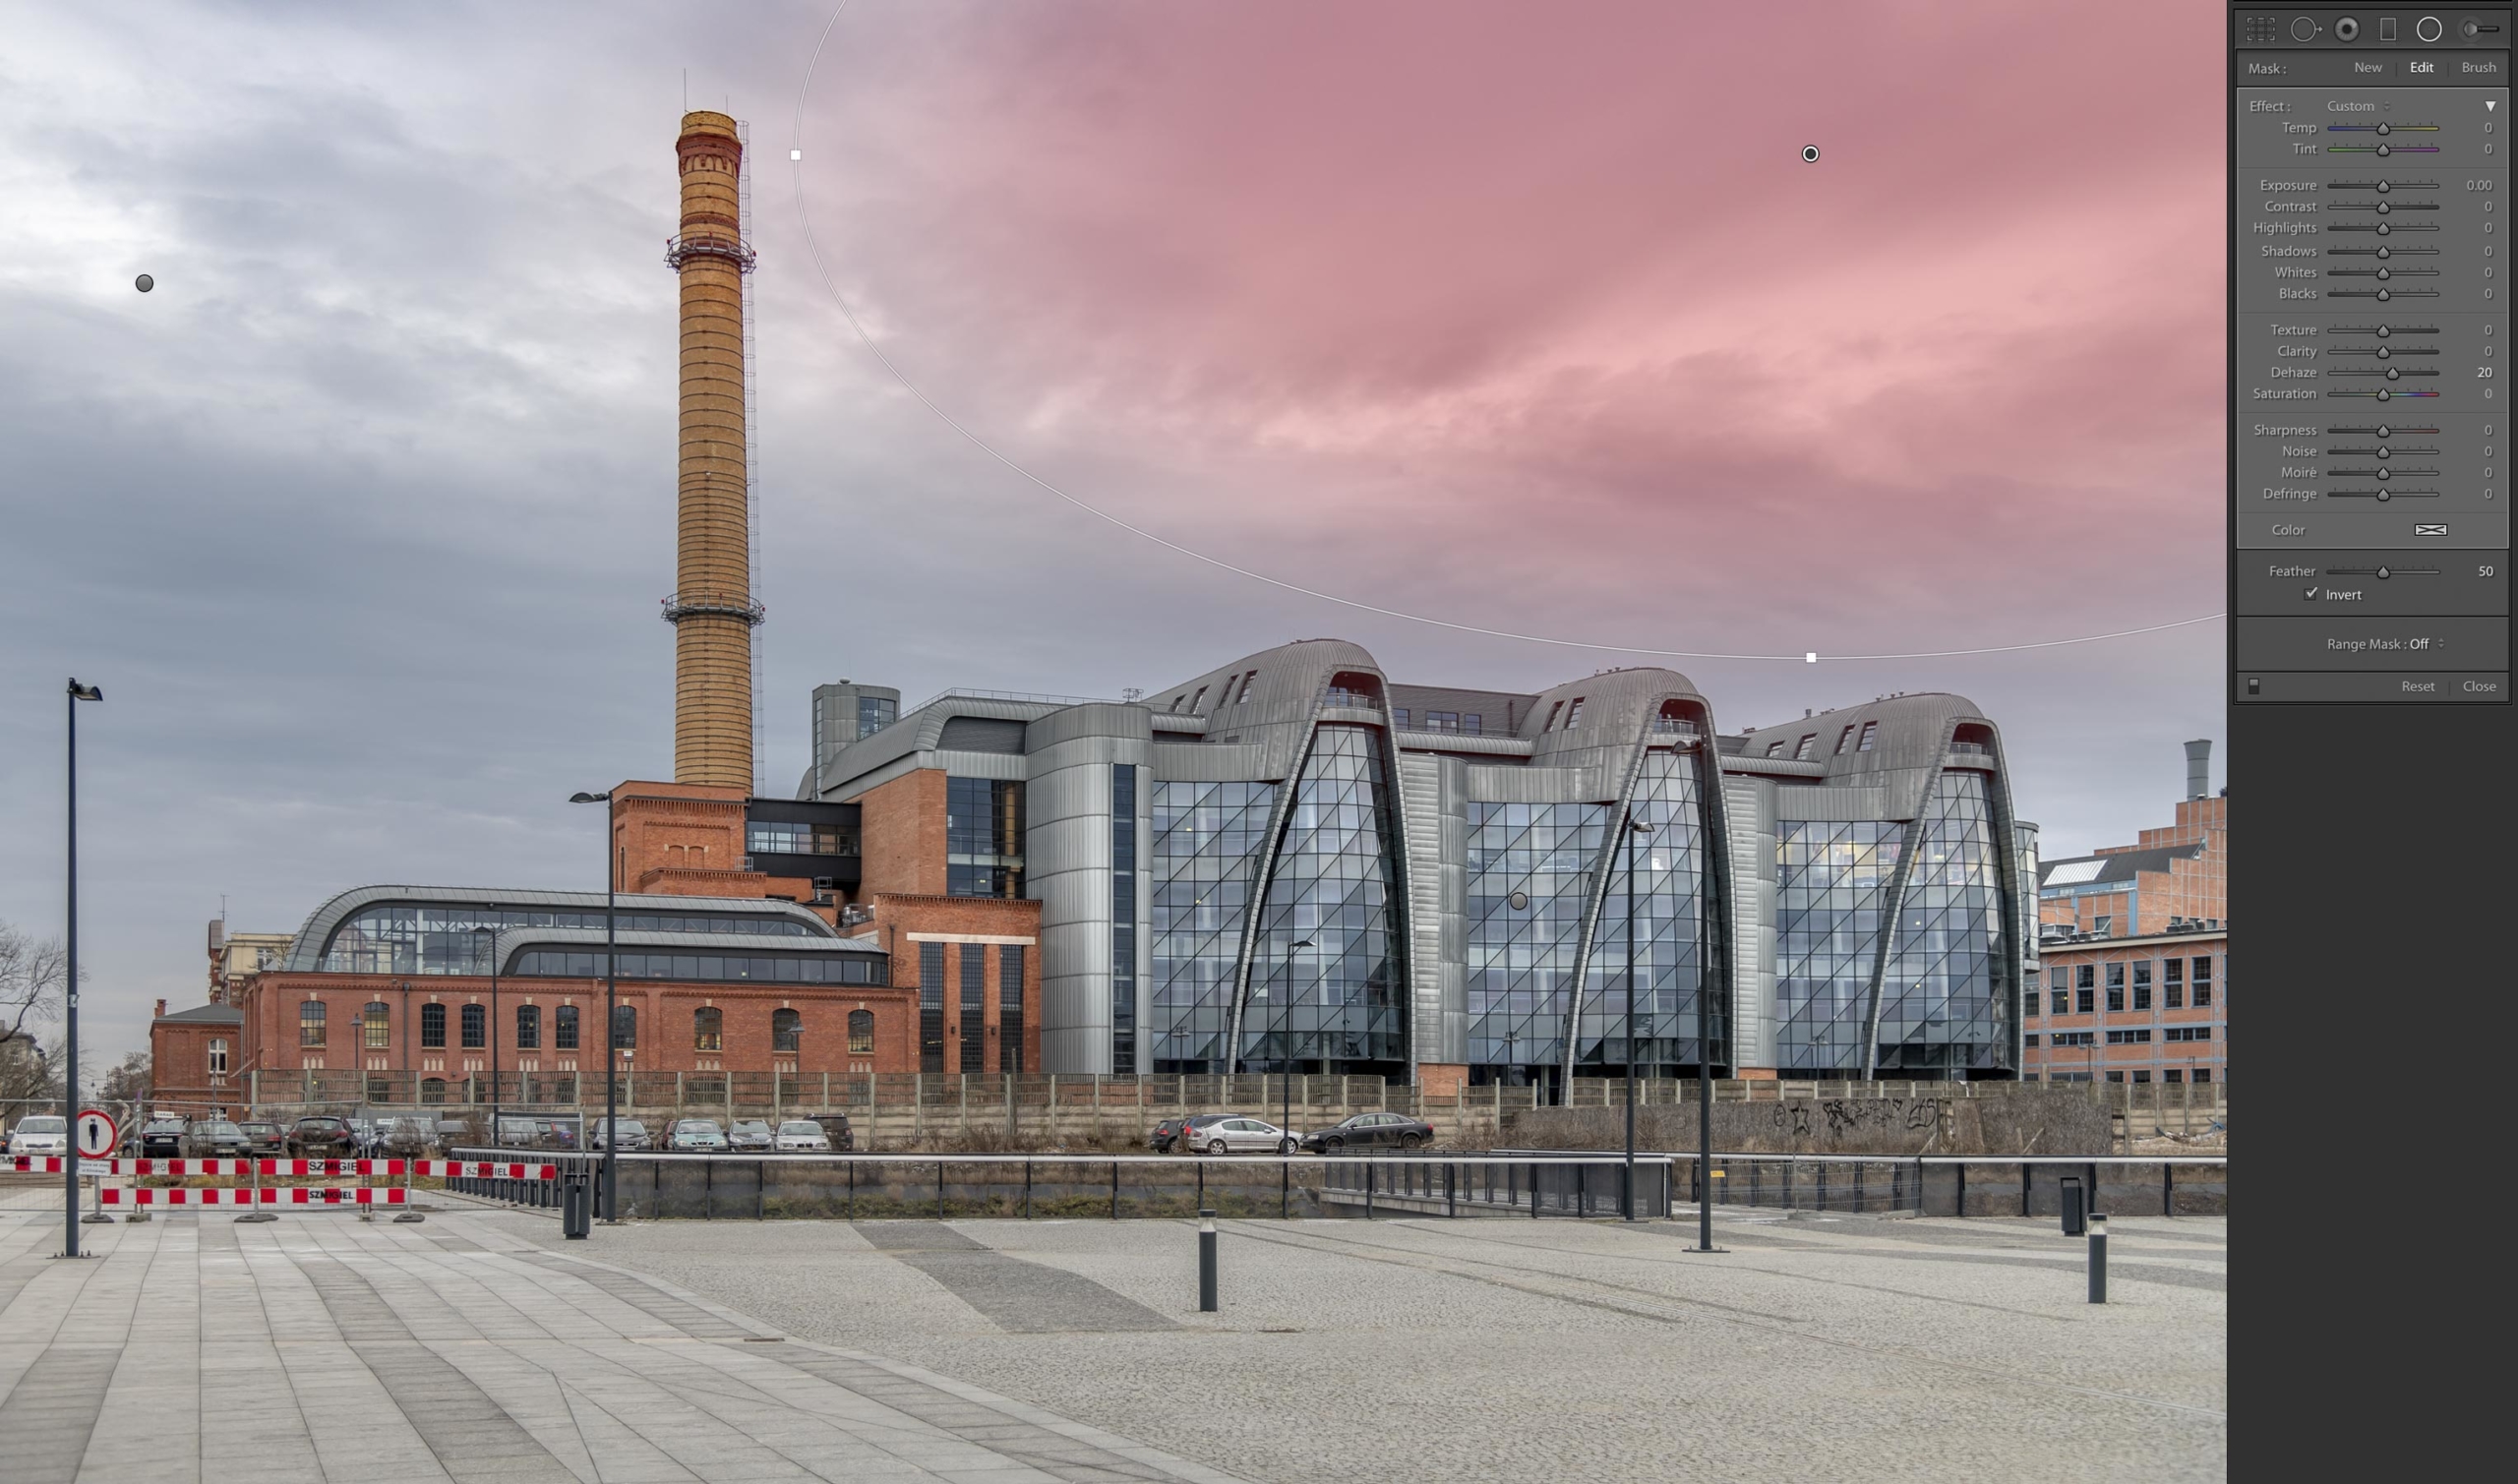
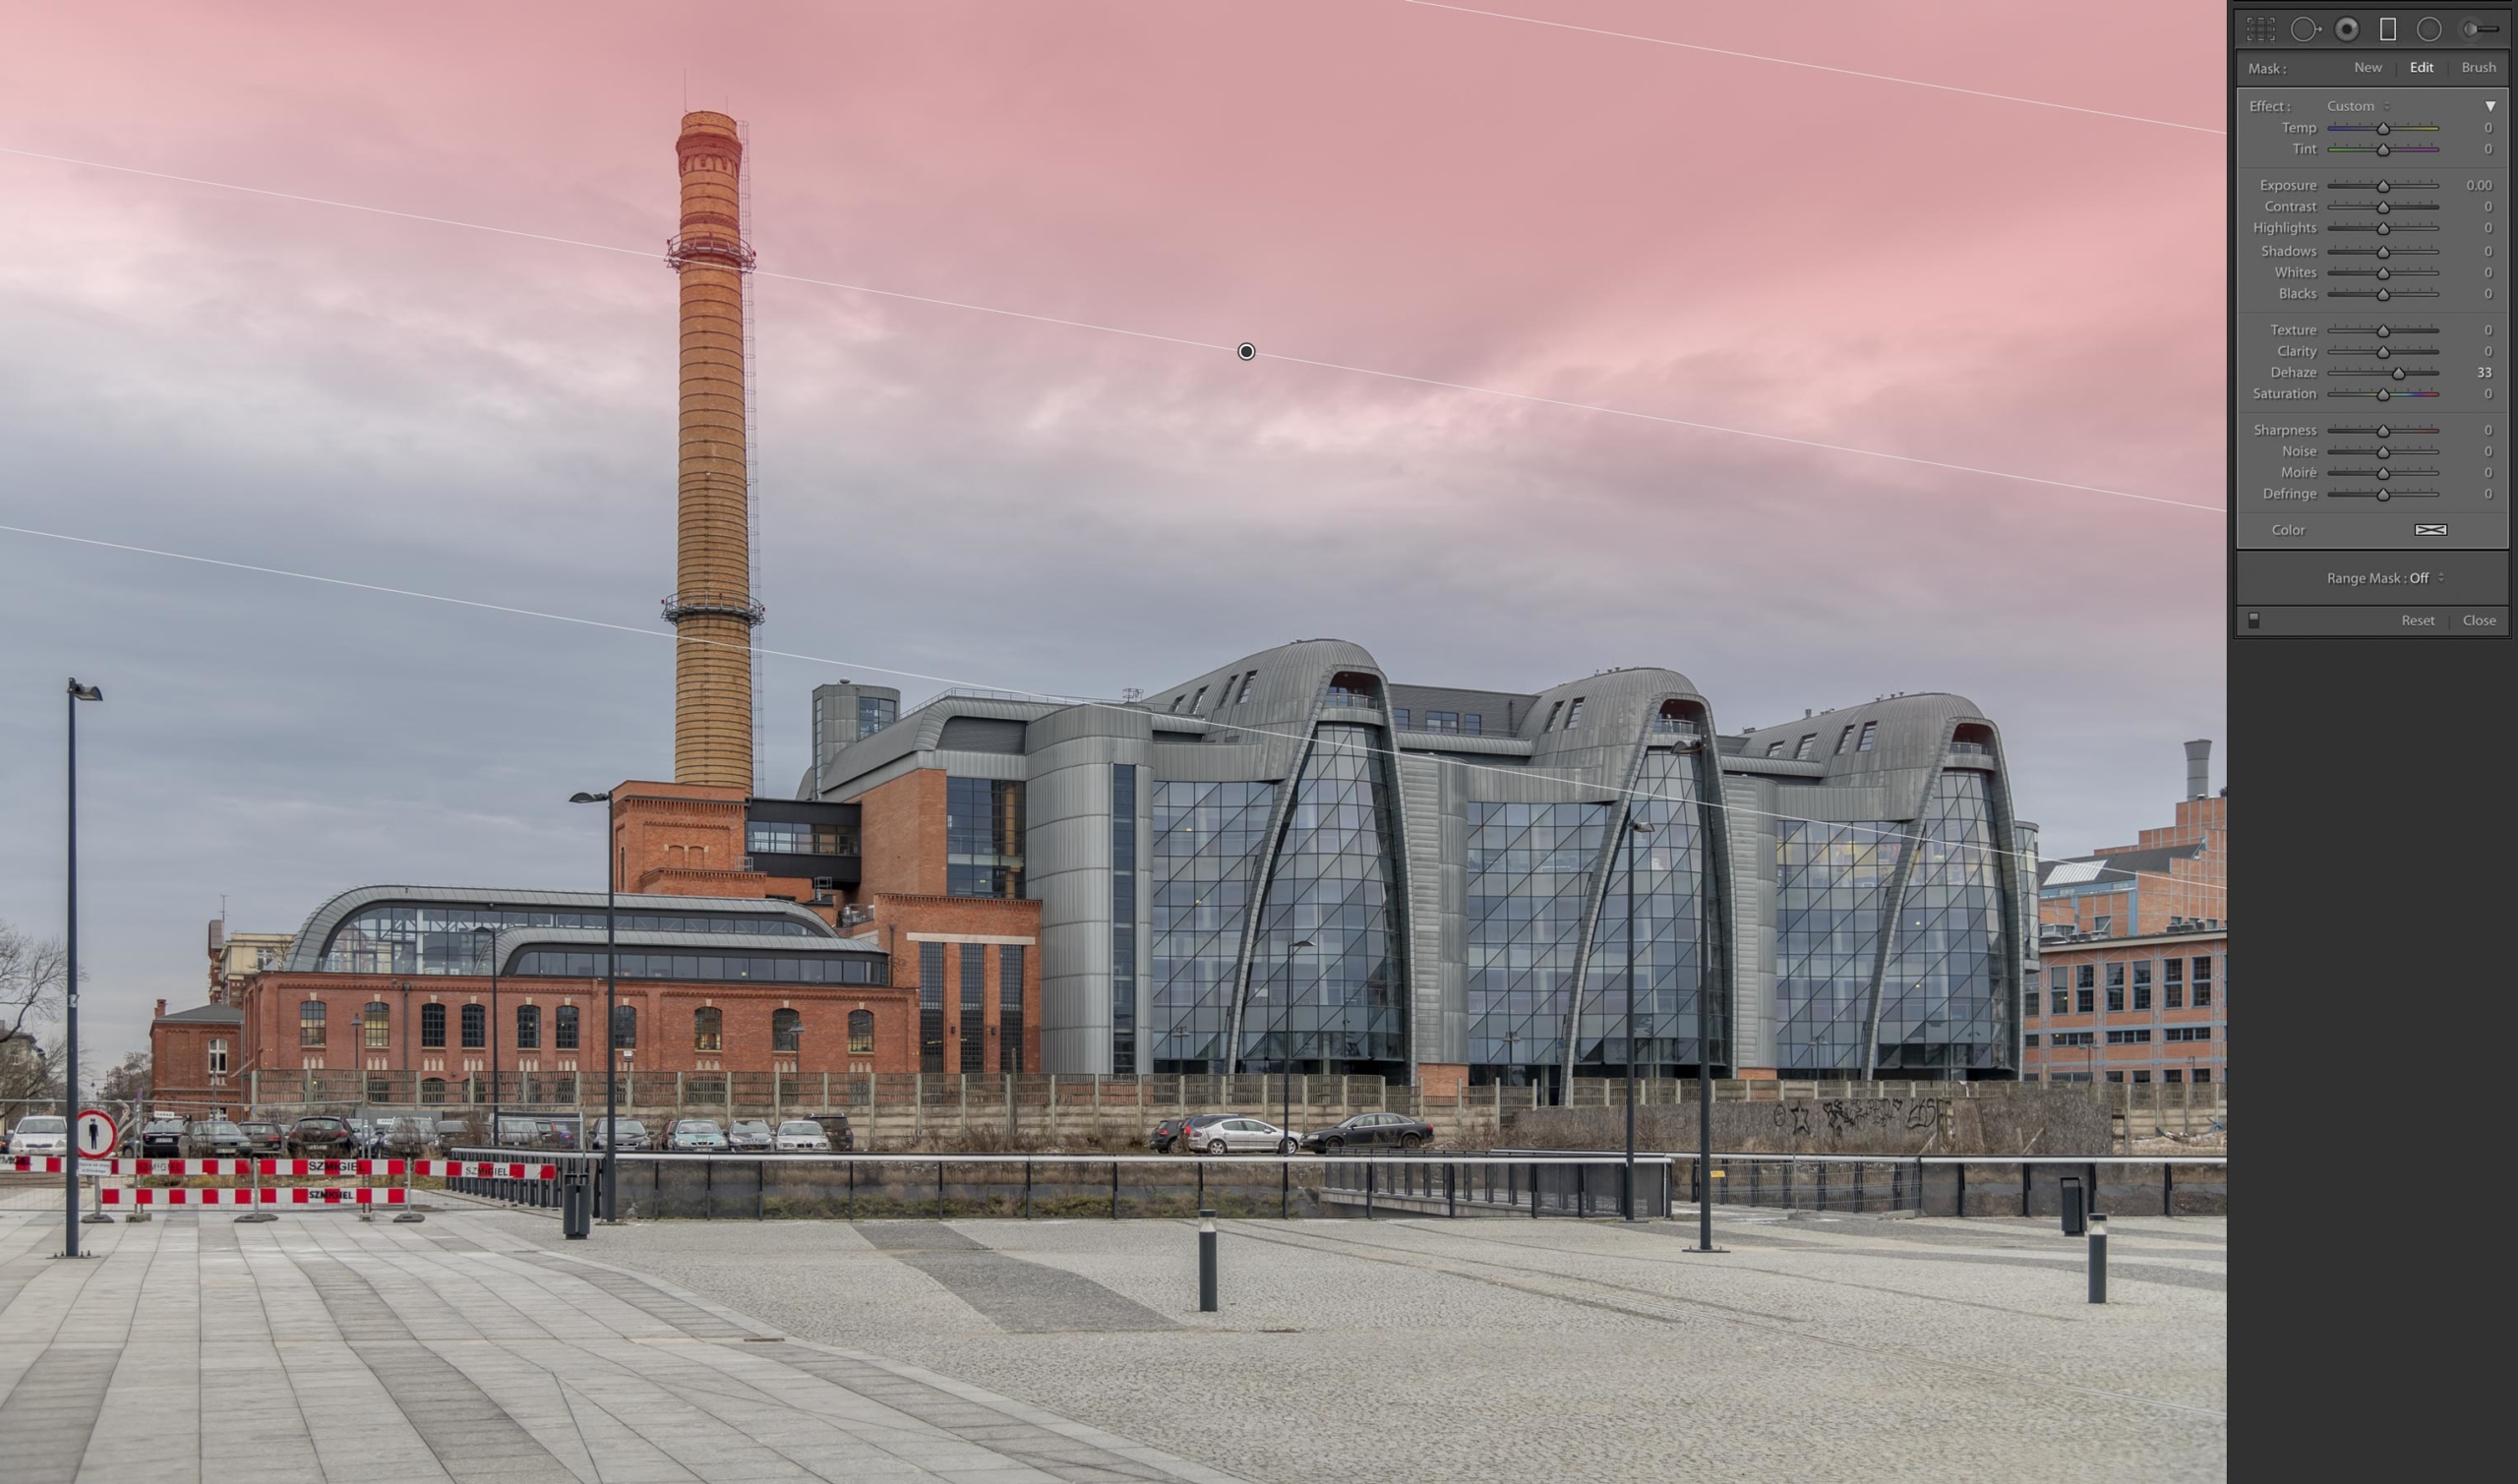
The easiest to use is the Graduated Filter which is ideal when the area to be altered can be defined by a straight line. So to darken the sky it would be an obvious filter to use – except that the effect would also change the appearance of the chimney. Here I will use a graduated Dehaze filter above the chimney, then two separate radial filters on the areas of sky on either side of the chimney.

At the bottom left of each panel is a tiny up/down (on/off) slider. This is a useful way to see how the image would look with, or without the adjustment.

Photomanipulation - Before Graduated and Radial Filters

Before

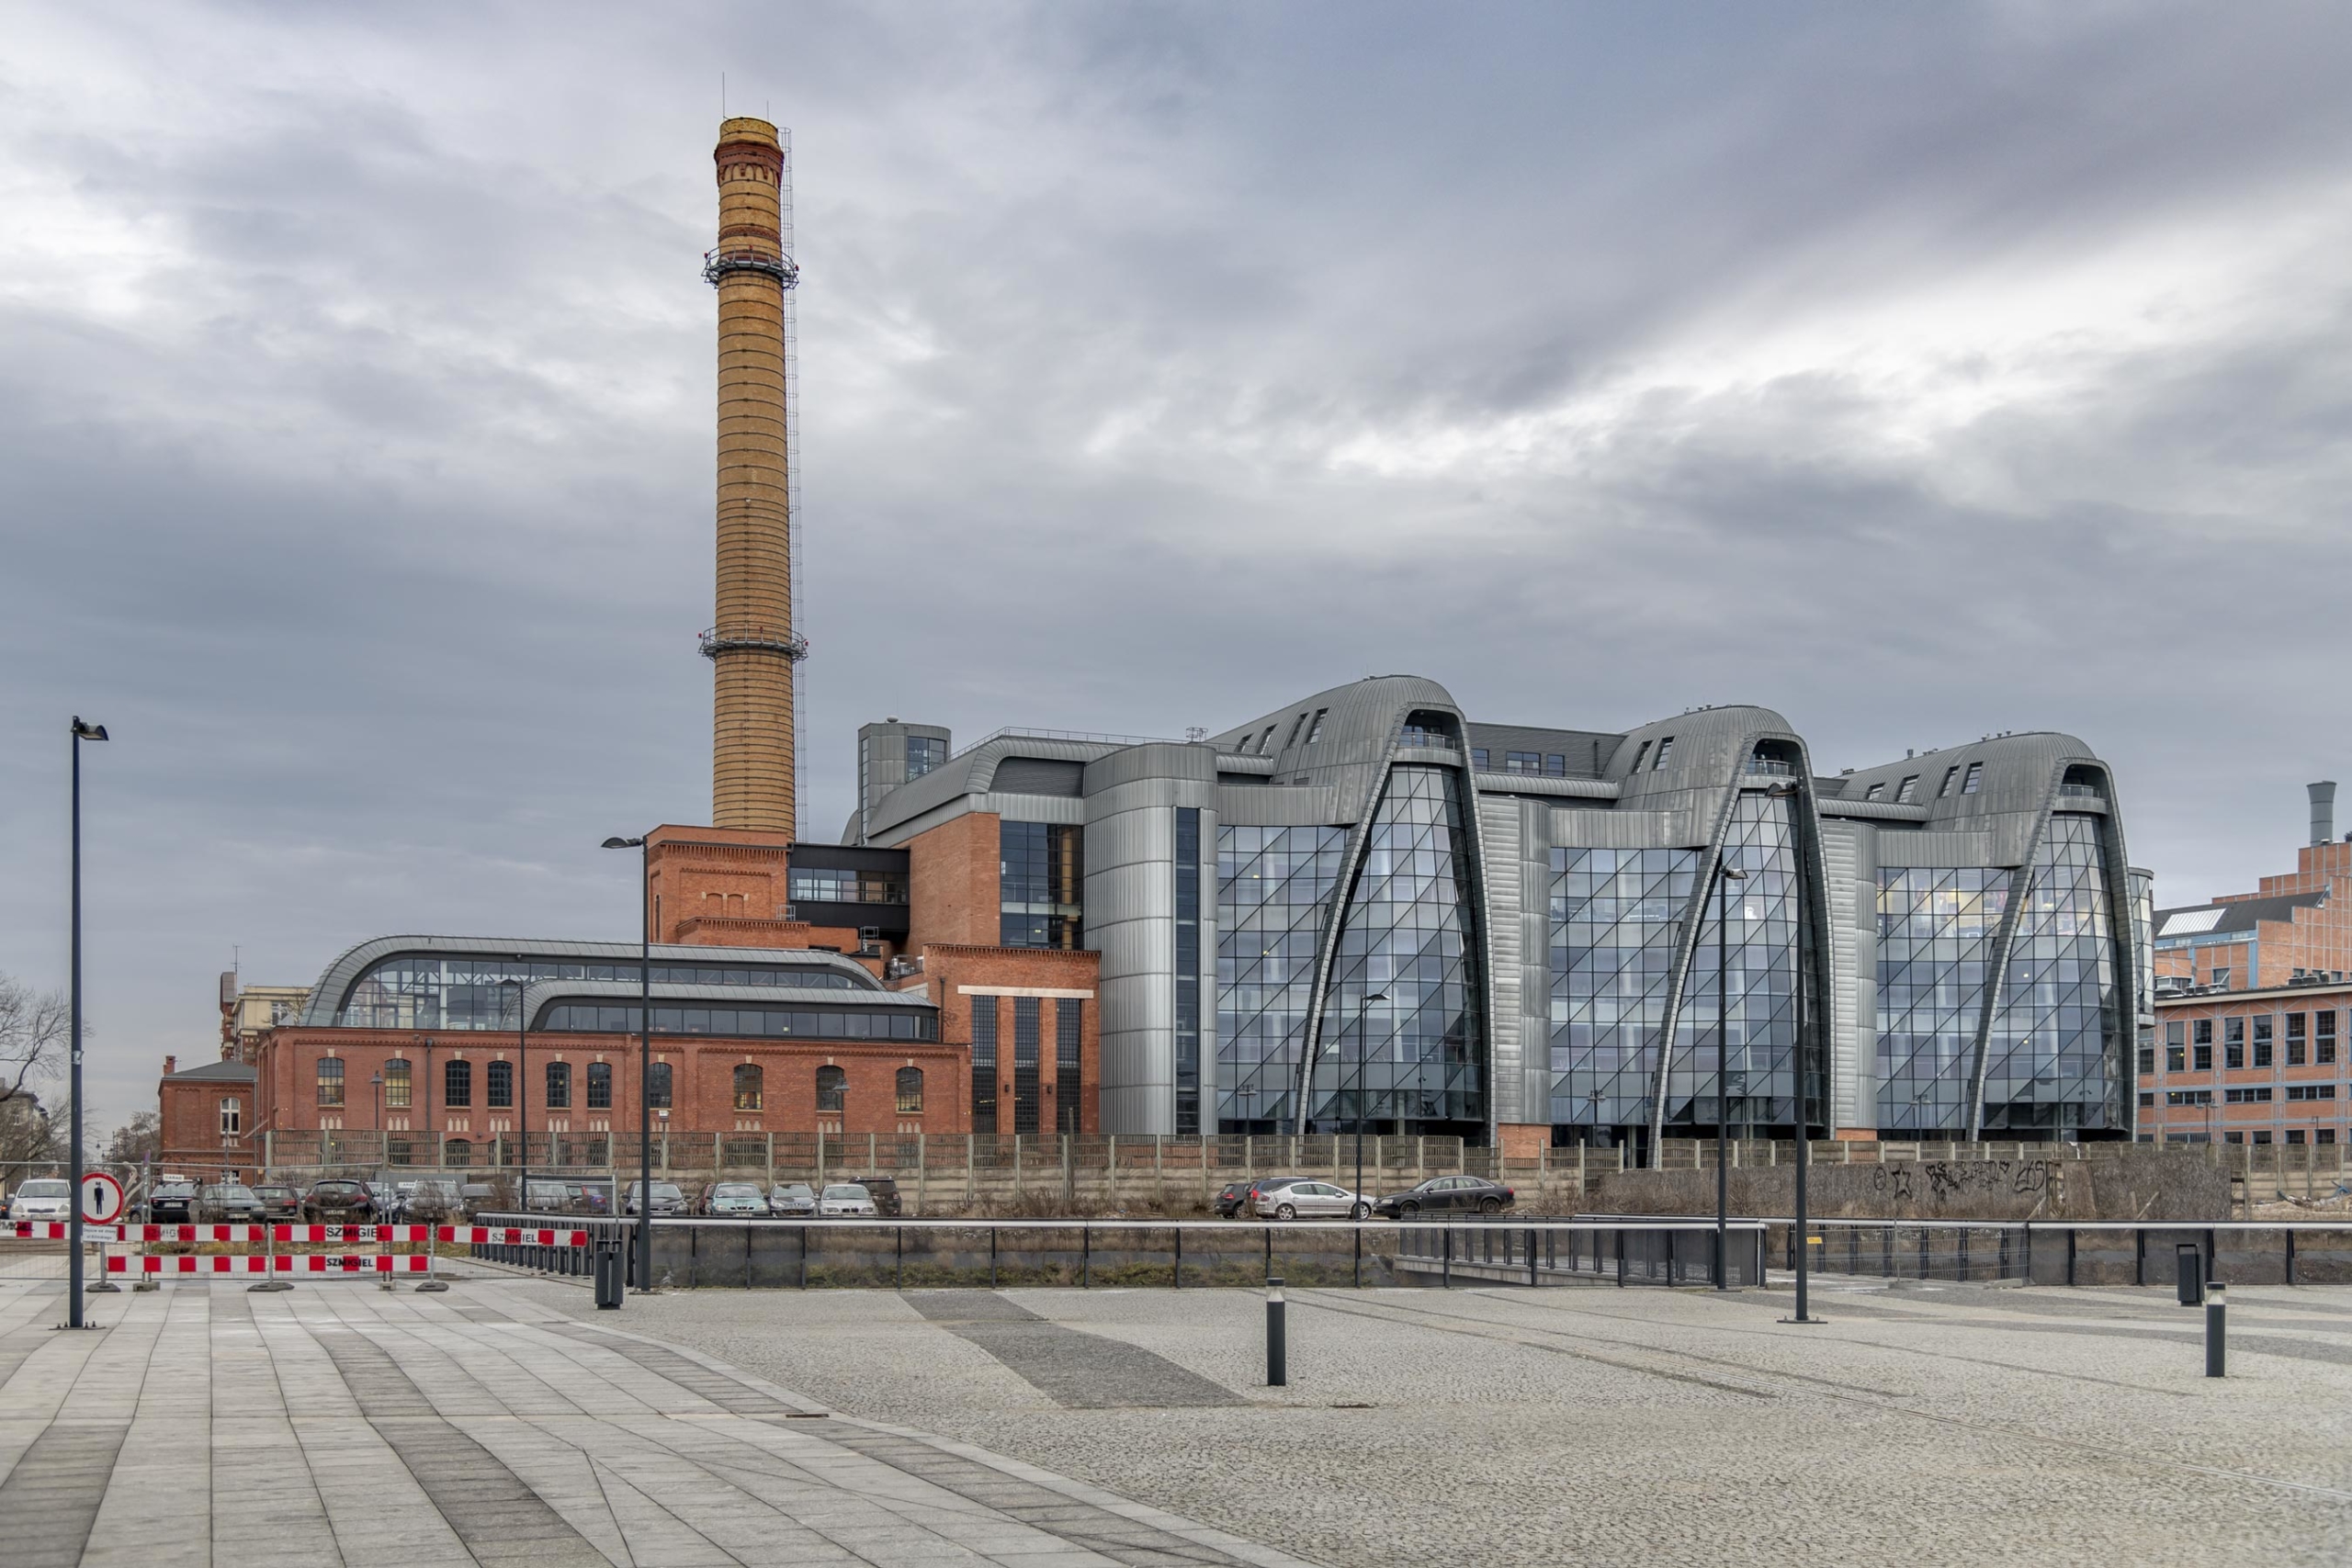
This planetarium building is part of a collection of museum buildings called EC1, reusing an old power station in the city of Lodz, Poland.

The sky is fairly dramatic already but this could be improved. The windows and foreground both look a bit gloomy so they would be other areas to improve.

1 Dehaze-Graduated-Filter

1 Graduated Dehaze Filter At The Top

The image can be adjusted with a simple graduated Dehaze filter across the top. Here I used a Dehaze setting of 33. I avoided the bulk of the chimney as I didn’t want it to get strangely darker at the top.

The Dehaze filter darkens the darkest areas even more. Increasing the level of Dehaze, Lightroom darkens adjacent pixels to the first ones. The highest setting dramatically spreads the darkness – some people use this effect on the whole image giving a very distinctive and oppressive look. But for me I think this looks too obvious, so don’t get too carried away Dehazing!

2 Dehaze-Radial-Filter-1

2 Top Right Radial Dehaze Filter On The Sky

I usually deal with the largest areas first. So the top right of the sky is the best place to start. Here I have used the Radial Filter to draw an ellipse. To change the shape of the ellipse, click on the central control button to select it, then use any of the four adjustment handles to drag the shape of the ellipse. I used a Dehaze setting of 20 to darken the sky.

3 Dehaze-Radial-Filter-2

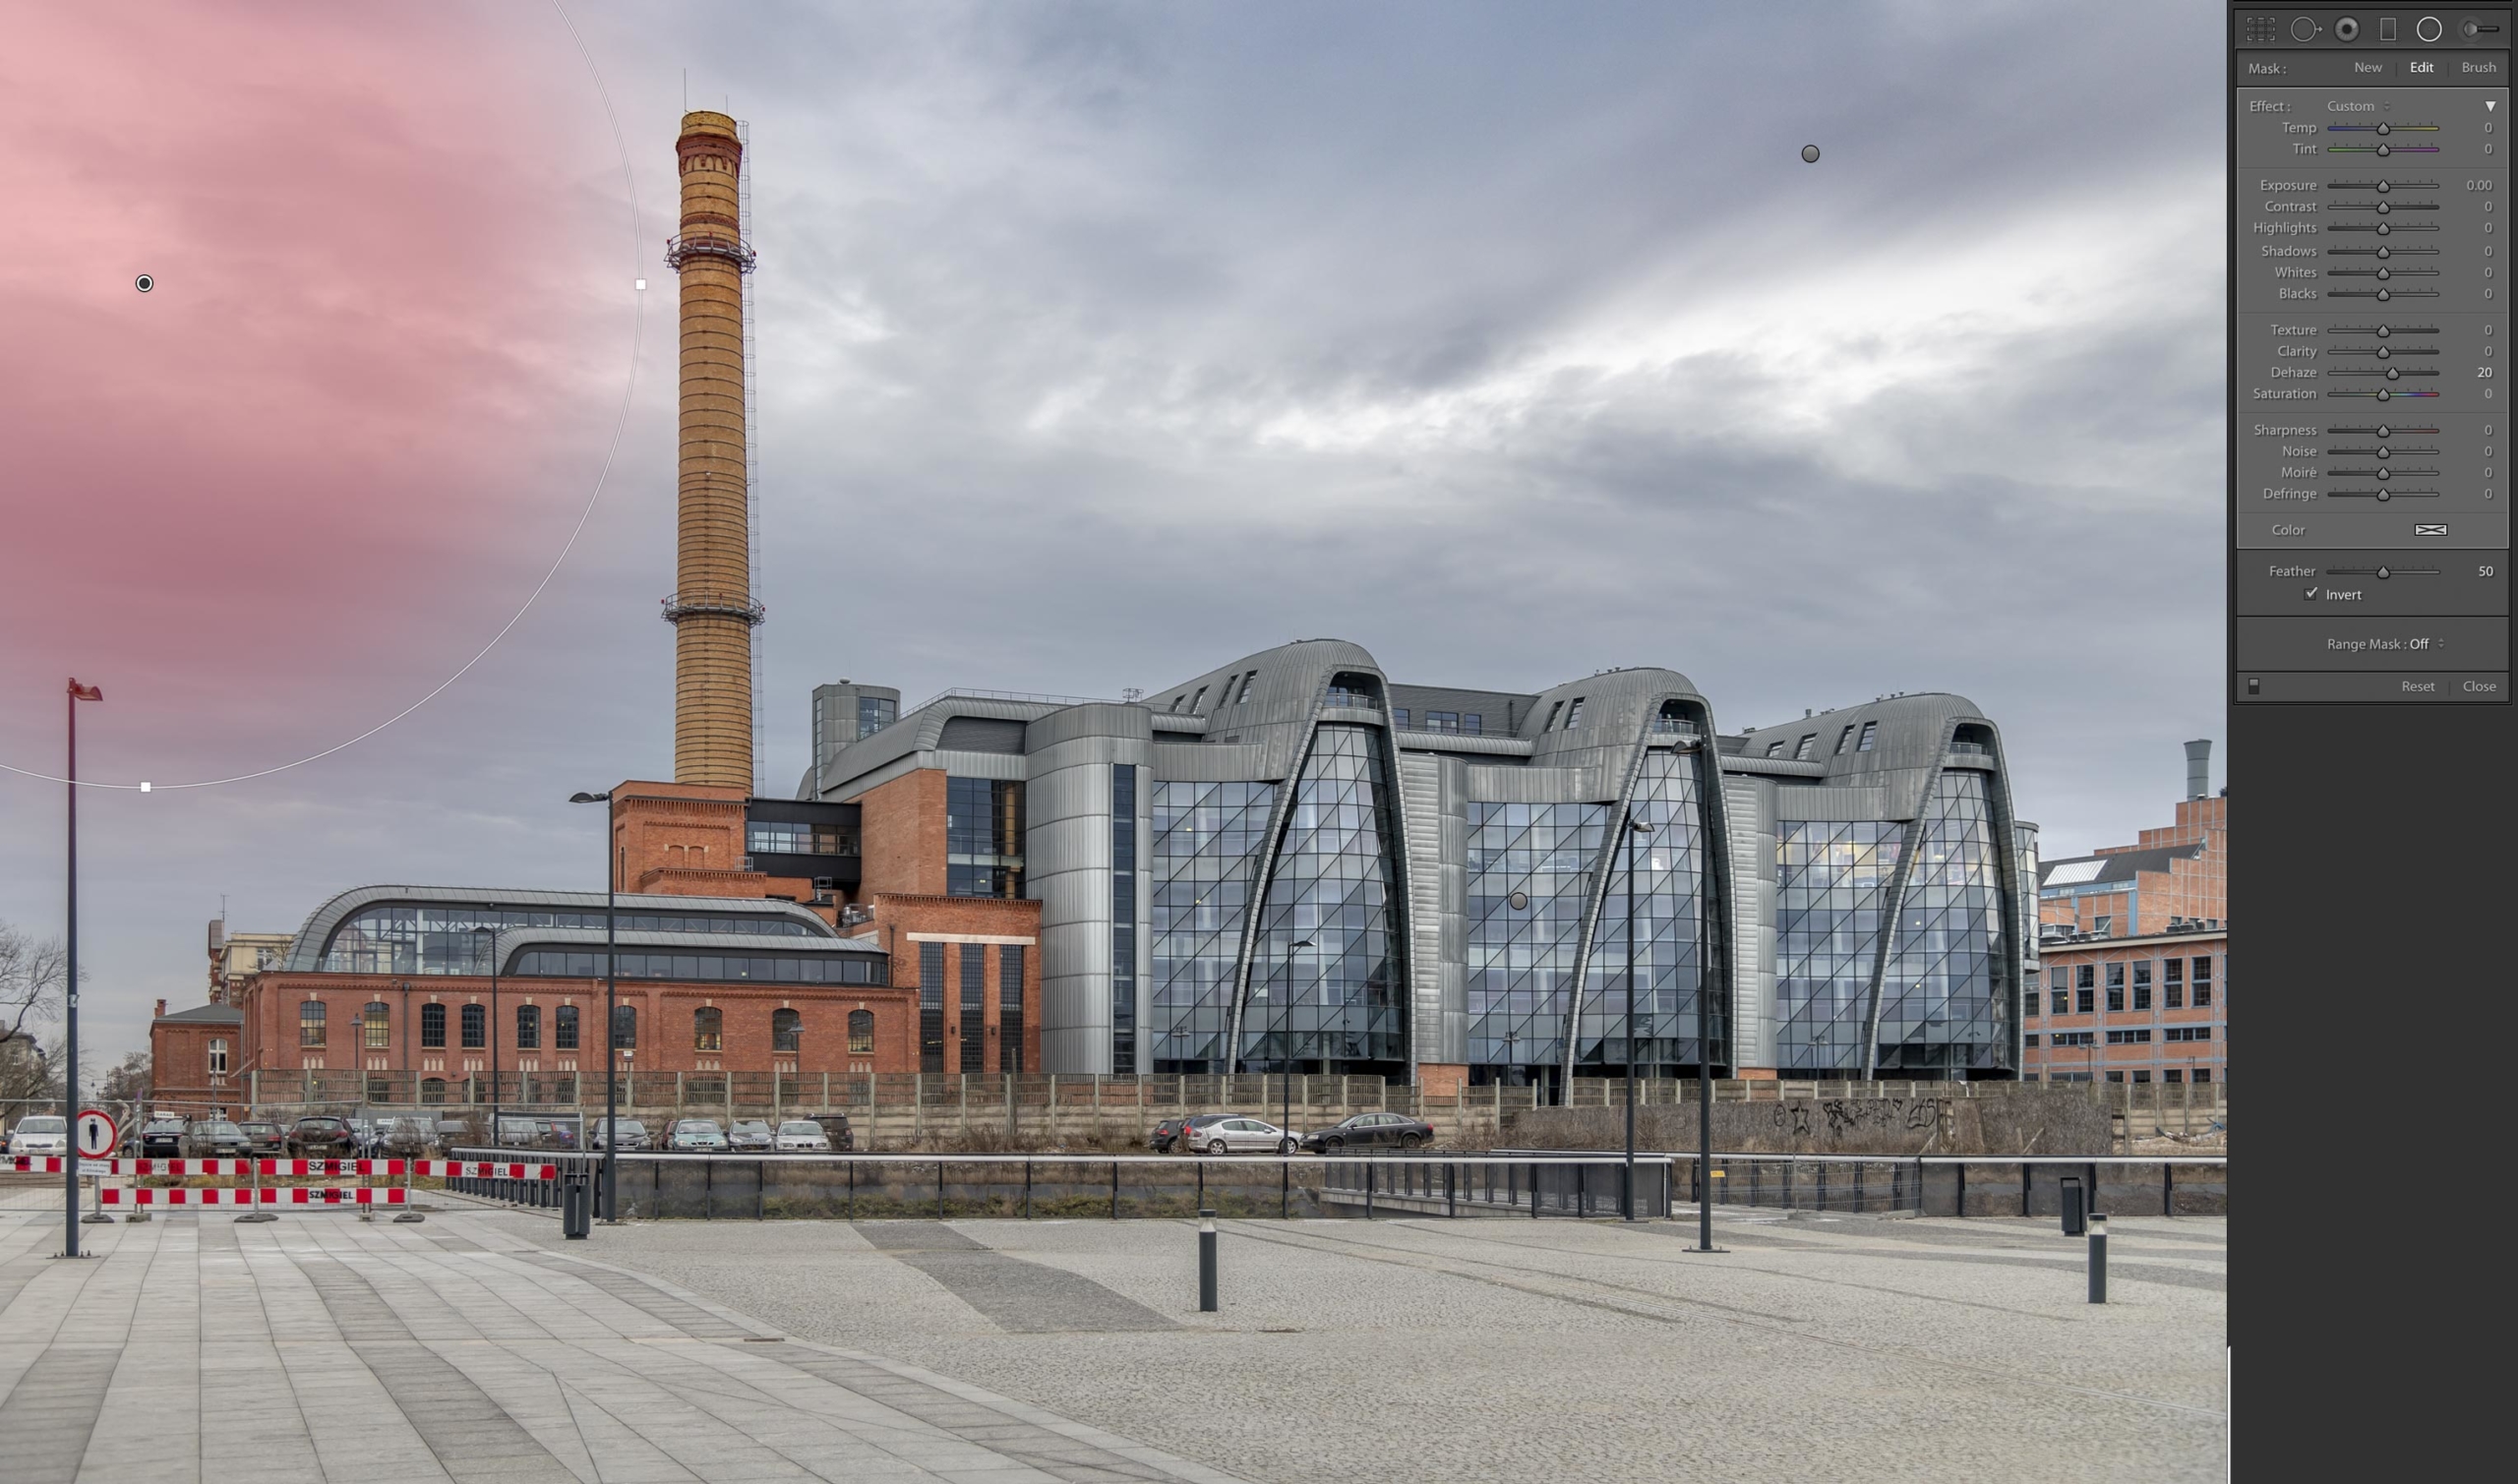
3 Top Left Radial Dehaze Filter On The Sky

To save time duplicate the filter – control click on the button select Duplicate. This second filter sits on top of the first one. So I selected and dragged this to the left side of the sky – see below. The second filter can be separately adjusted of course, here I kept the same Dehaze setting of 20.

4 Clarity-on-window-areas-Radial-Filter

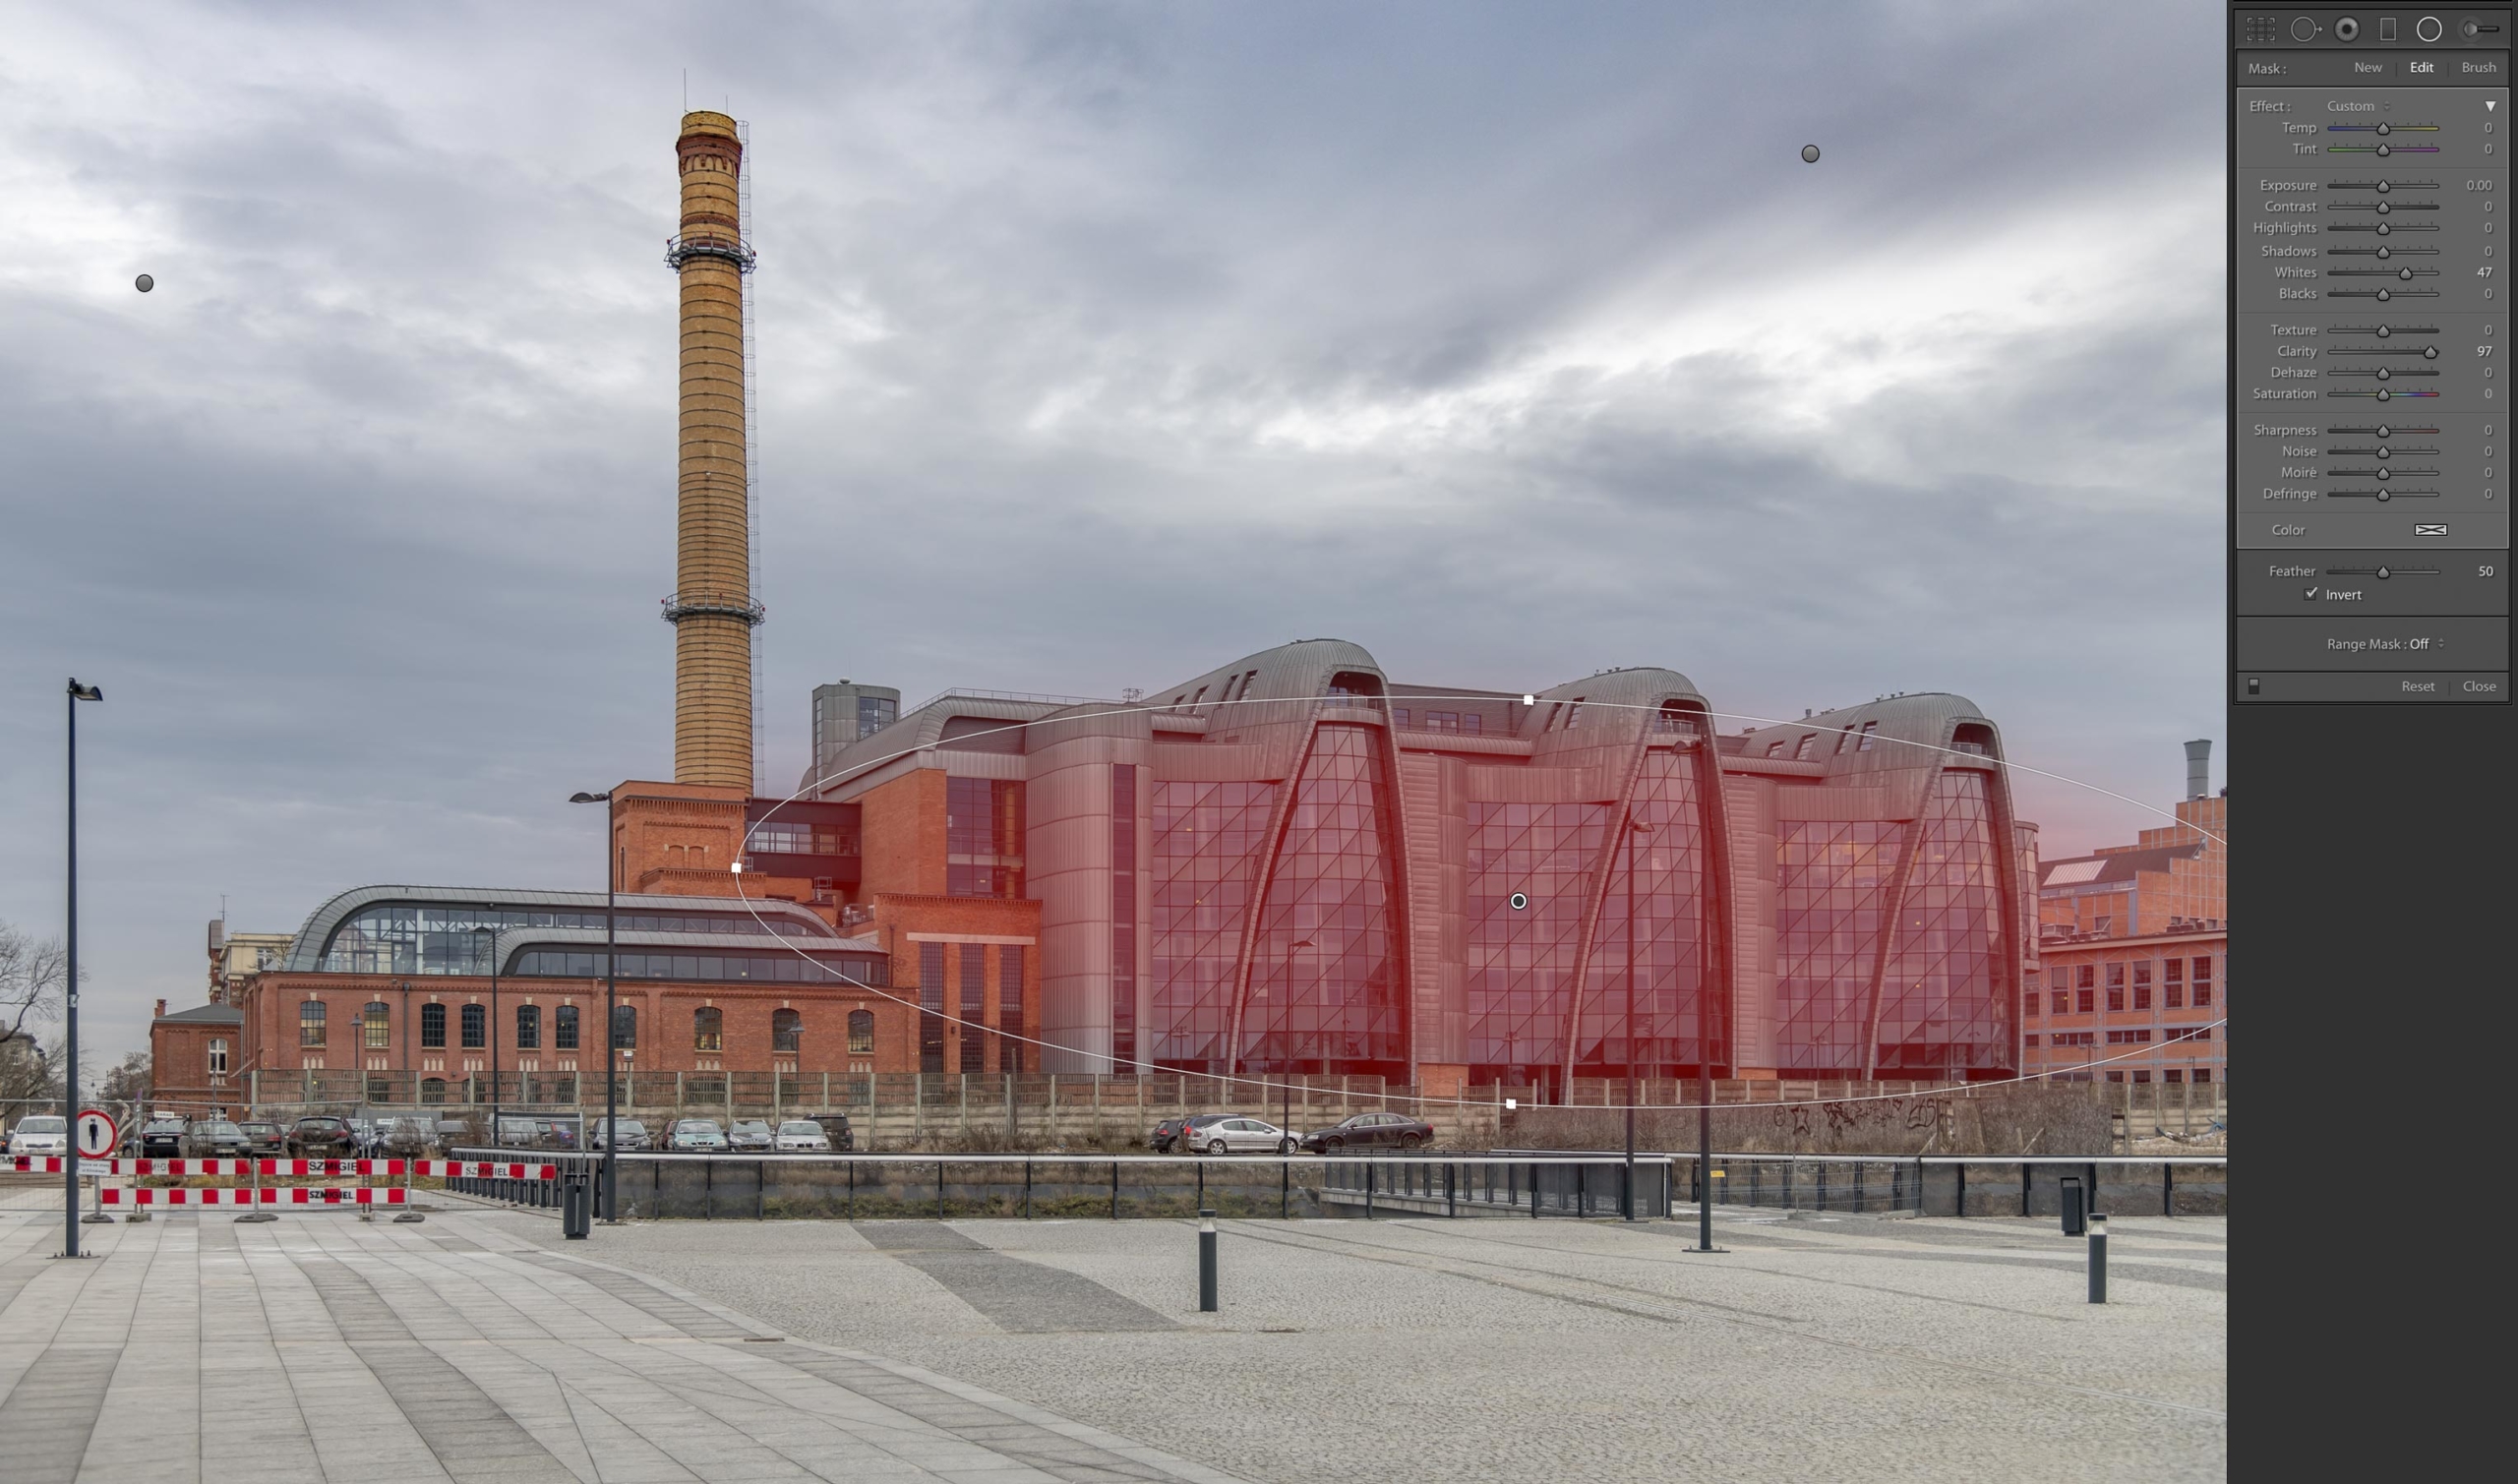
4 Radial Clarity Filter On The Windows

The clarity filter effectively increases contrast, it is also particularly good at making areas appear more shiny – so ideal for windows. Here I created an ellipse-shaped Radial Filter to enclose the window areas, then changed the Clarity setting to 97 and the whites to 47.

5 Clarity-on-floor-Graduated-Filter

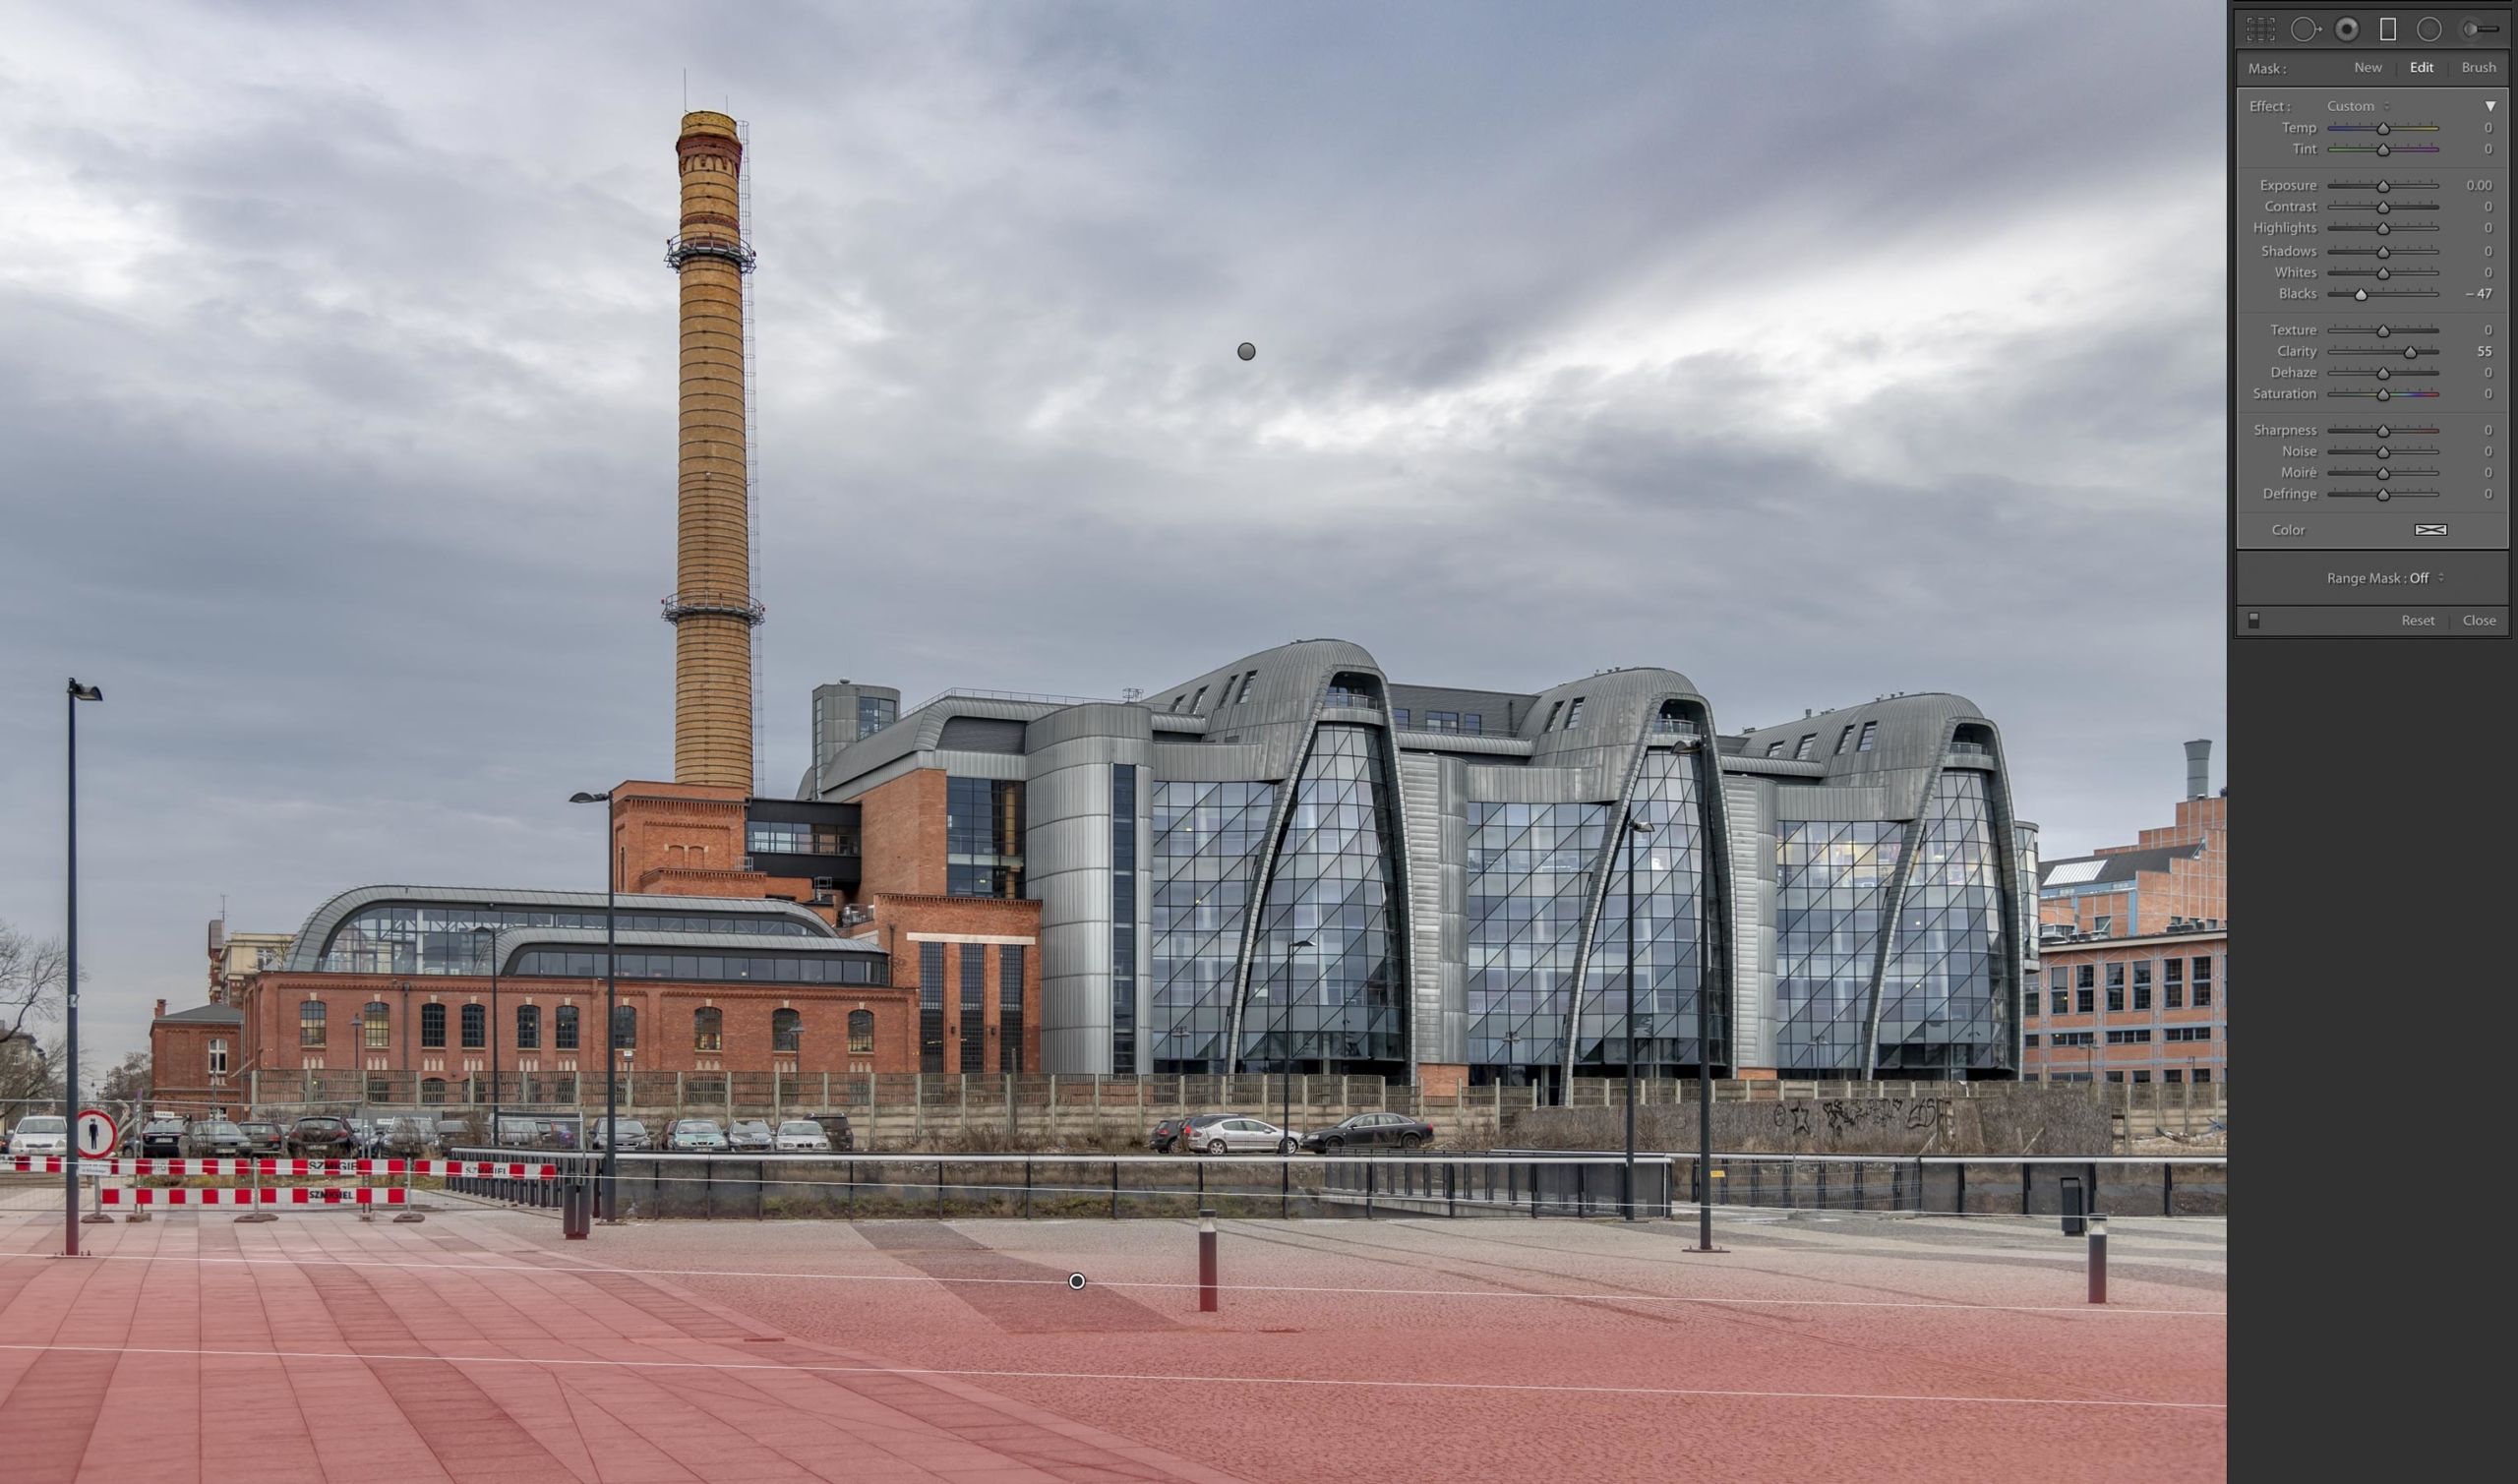
5 Graduated Clarity Filter On the Foreground

The final job is to crop the image to remove the last of the white canvas areas. Resist the temptation to check Constrain Crop as this setting will lose more pixels.

Copyright © 2004–2026 Colin Walton • Website designed by WaltonCreative
error: Sorry the content on this website is copyrighted ©